How to Build a Child Size Adirondack Chair
We’ve been building Adirondack Chairs for over 10 years now. Our adult sized chairs are favorites for their curved back and wide arms. They’re perfect for relaxing on the back porch while the kids play.
Once we had grandchildren, we started making a child size Adirondack chair. The kids love these because they fit them so well and Mom and Dad love them because it’s a sturdy chair that doesn’t tip over easily, even when they roughhouse!
We’ve put together this post so you can make your own chair. Follow along on YouTube or download the plans here.
If you’re in the Nashville area, we’re happy to make them for you. Just contact us here
A Child Size Adirondack Chair Parts List:
See below for dimensions and layout
- Part 1 – Arms – 2
- Part 2 – Legs or mainframe support – 2
- Part 3 – Front legs and arm support – 2
- Part 4 – Piece that attaches to Part 2 and supports back slats – 1
- Part 5 – Back legs and arm supports – 2
- Part 6 – Arm Supports – 4
- Part 7 – Attaches to top of Part 5 and supports middle of back slats – 1
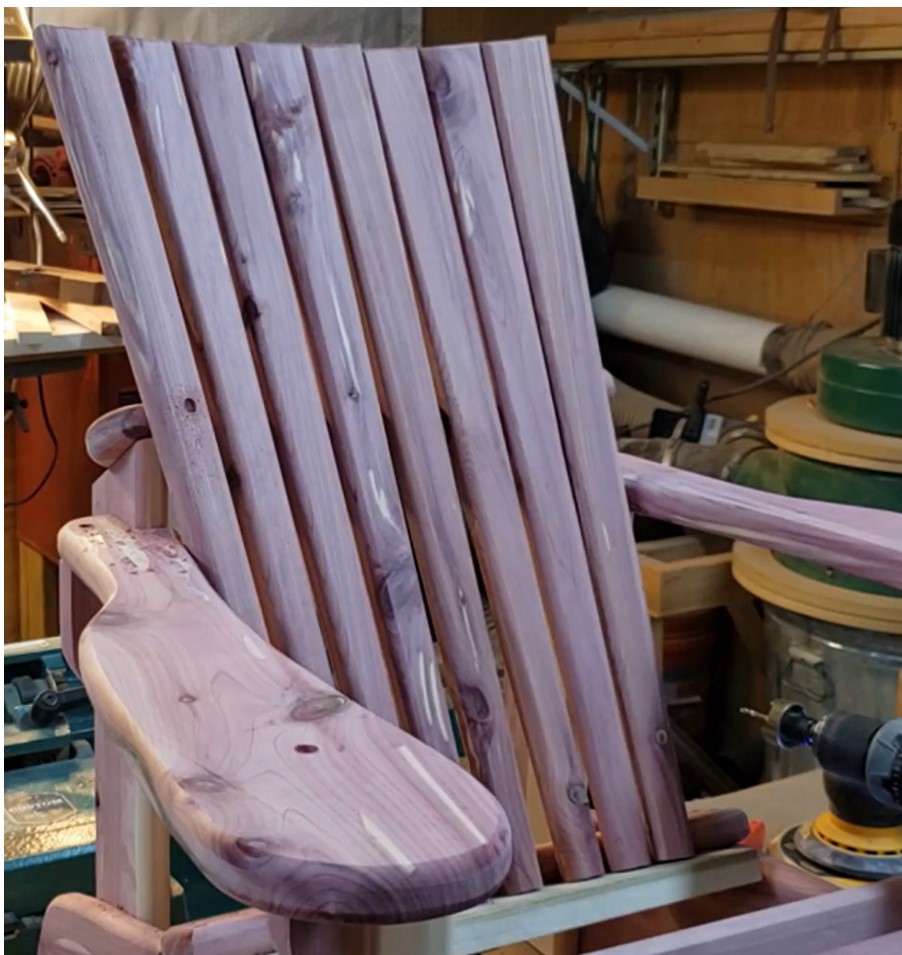
- Part 8 – Back slats – 7 or 8
- Part 9 – Seat slat that rests against the back slats -1
- Part 10 – Seat slats – 6
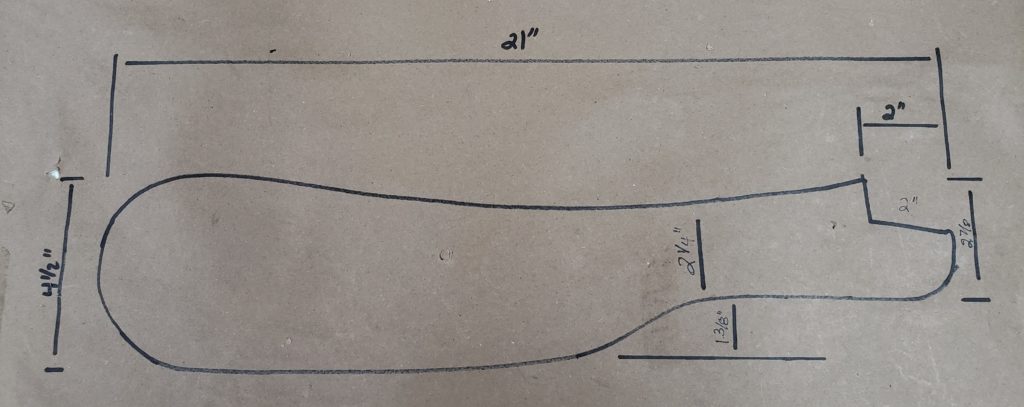
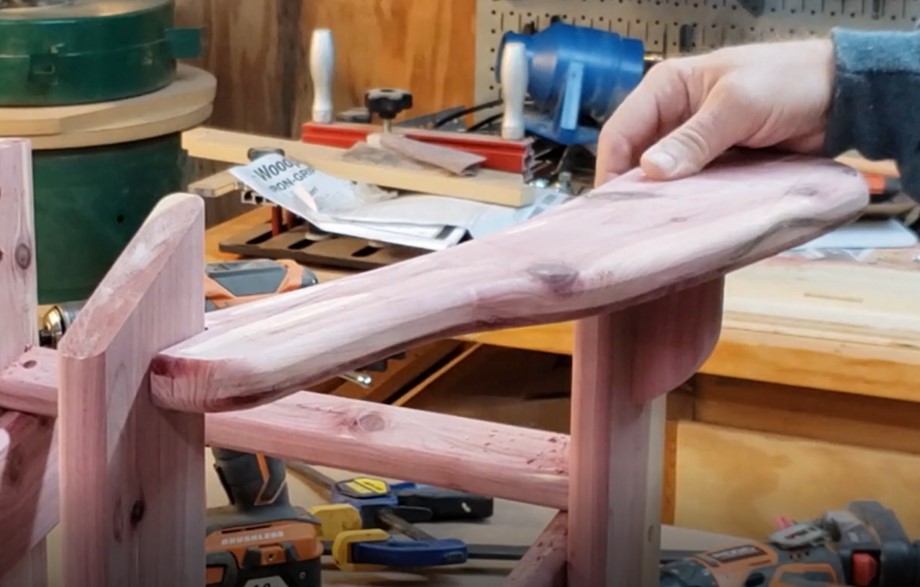
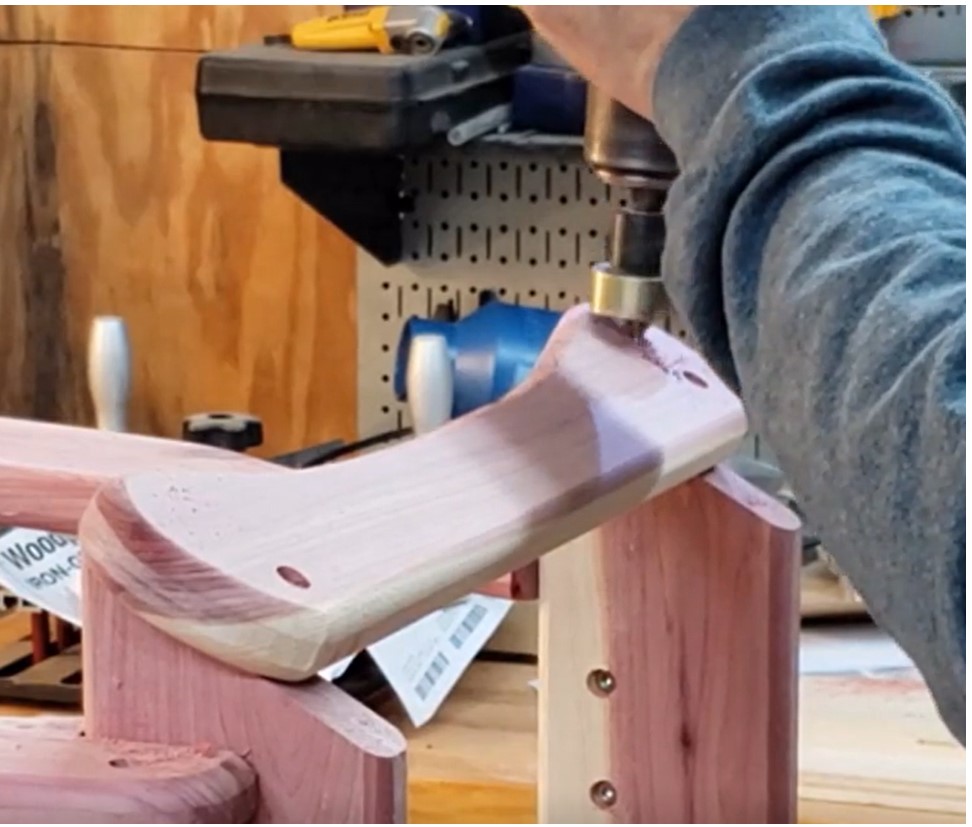
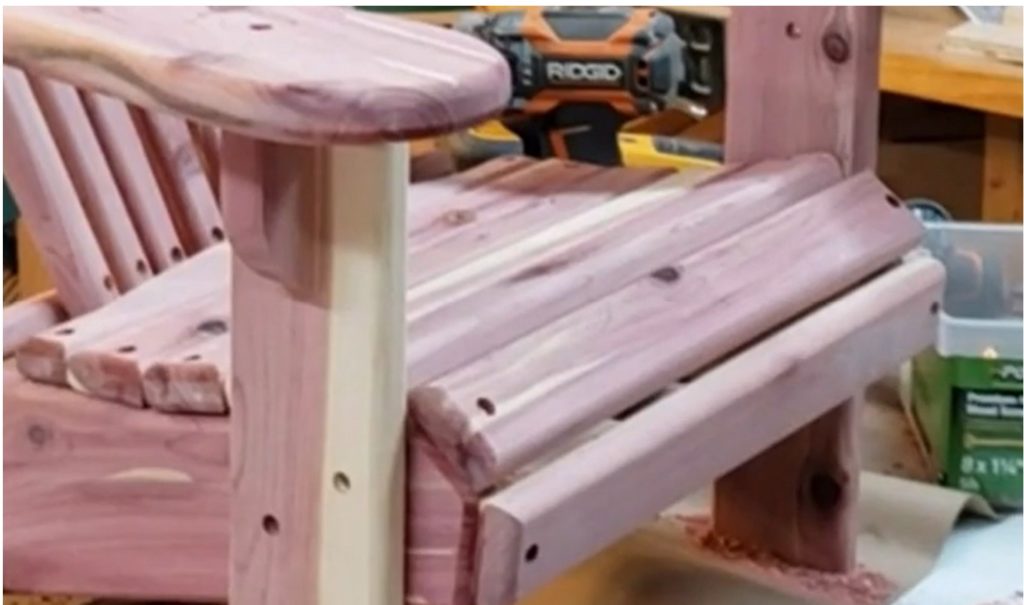
PART 1 – Arms for the Child Size Adirondack Chair
These arms are ¾” thick and you will need 2 of them.
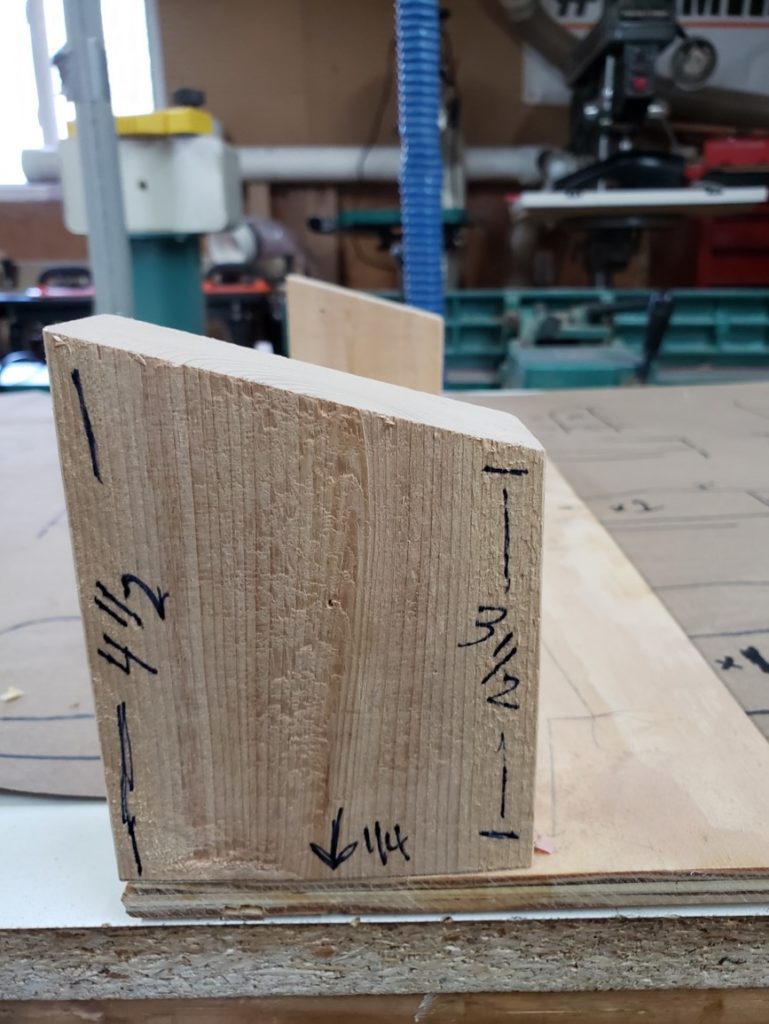
PART 2 – Legs or Mainframe Support
The support parts in the diagram below give the chair its rise and its overall support. You will need 2 of these.
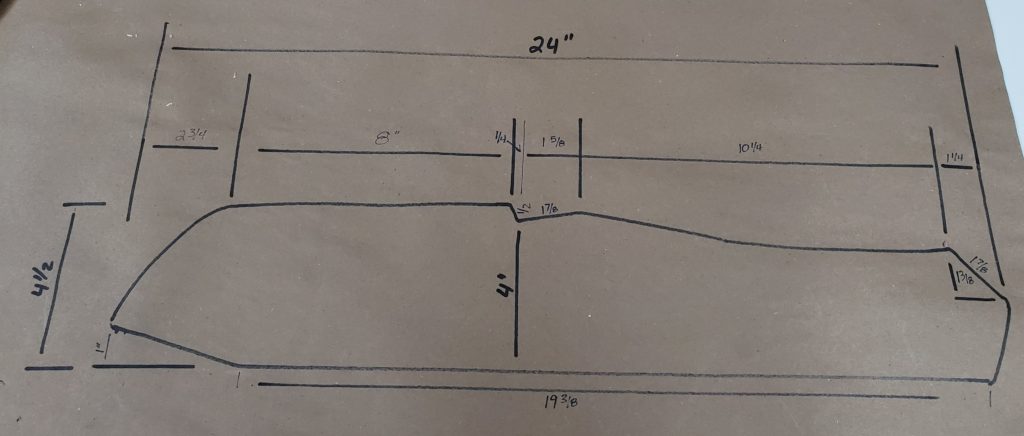
- This is the jig used to support part 2 to determine height and angle of chair.
- With the higher part of angle facing front, set part 2 on this with front forward to determine angle.
- The front of part 2 will be 1” from front. This will raise part 2 approx. 8 ¼” from workspace.
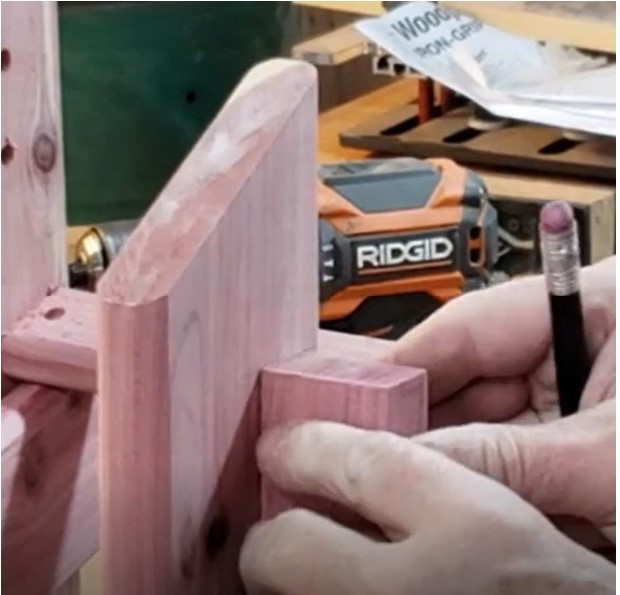
Part 3 – Front Legs and Arm Support
The front leg supports the front of the child size Adirondack chair. With the jig holding part 2 in place, set the leg at the 1” mark and secure it with screws. Repeat process on other front leg.
Part 4 – Piece that Attaches to Part 2 and Supports Back Slats
This piece rests on the notch of part 2 and keeps the width of the chair during assembly.
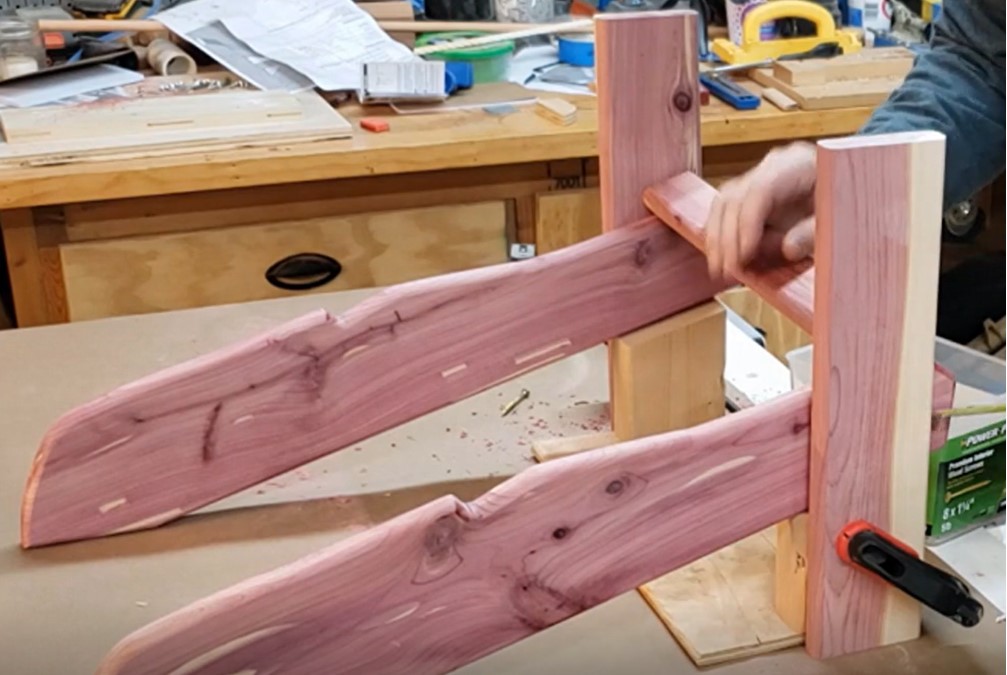
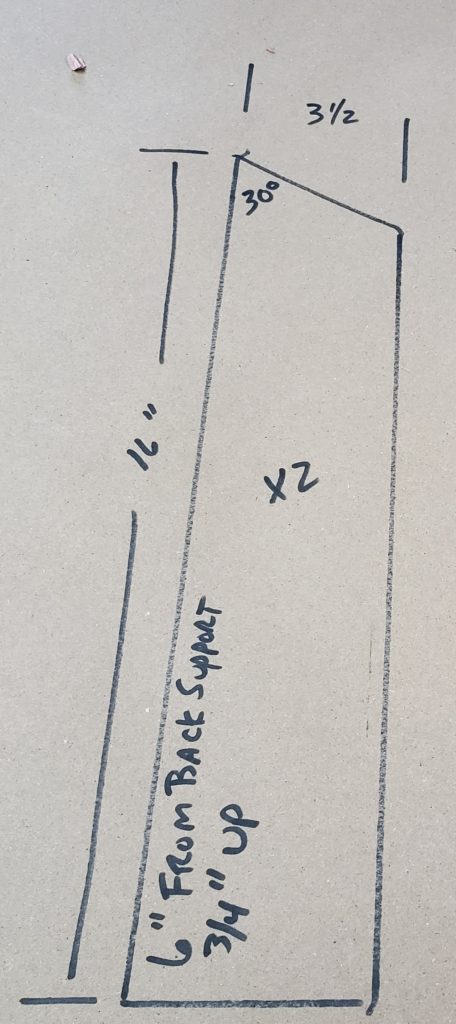
Part 5 – Back Legs and Arm Supports
The back leg and is used to support the back slats. This part goes on the inside of Part 2.
- Measure 6” back from part 4 and draw a vertical line.
- Lay one of the seat slats flat on your work place and stand this leg on top of it with the high point of the 30 degree angle towards the front of the chair and against the line you just drew.
- Clamp and screw the leg/support. Repeat this for the other side.
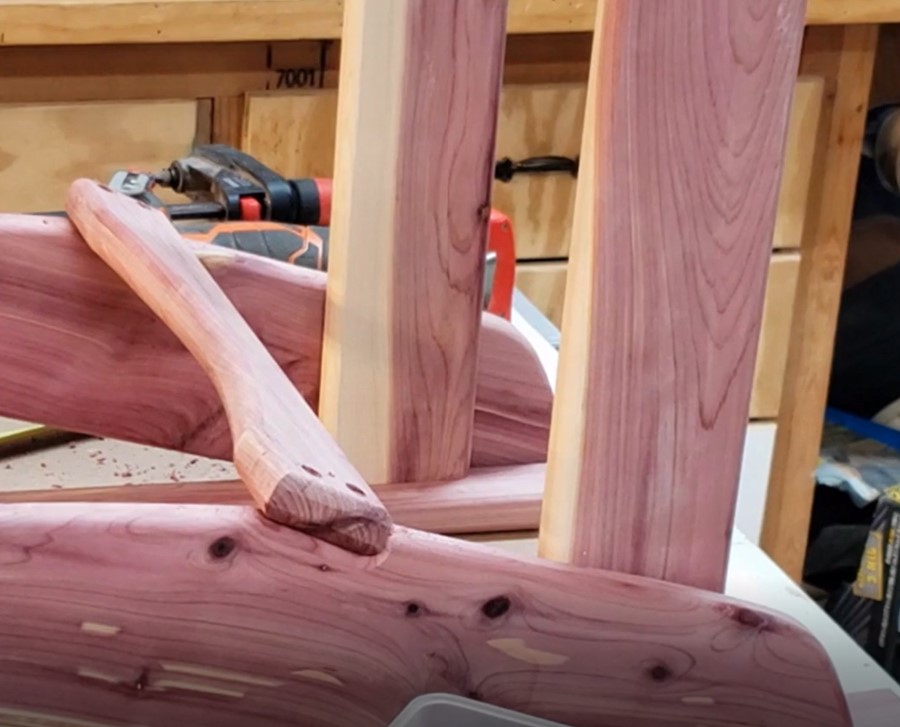
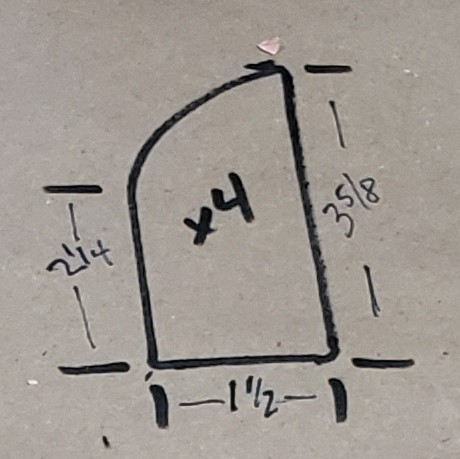
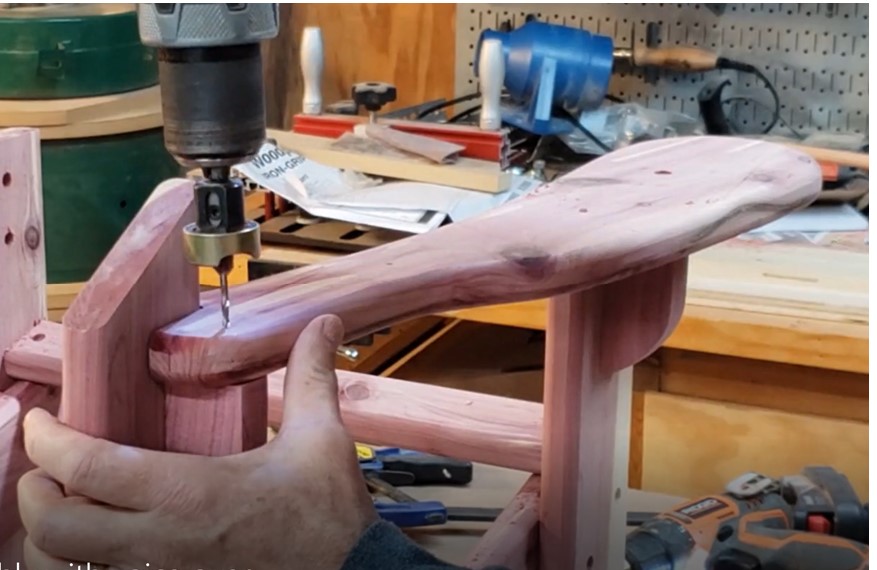
Part 6 – Arm Supports
Next, you’ll add the supports for the arms on both the front and back legs.
- Place the long edge at the center point of the front leg and secure with screws from the inside of the chair.
- Once secure, place an arm, part 1, on the front support and the notch of the arm securely into the back support.
- Firmly push the front of the arm onto the front support which will level the arm. Now draw a line under the arm at the back support. This will determine the top of the back support.
- Secure it with screws from the inside of the chair and secure the are to both of the supports.
Part 6 – Arm Support, continued
- Place the long edge at the center point of the front leg and secure with screws from the inside of the chair.
- Once secure, place an arm, part 1, on the front support and the notch of the arm securely into the back support.
- Firmly push the front of the arm onto the front support which will level the arm. Now draw a line under the arm at the back support. This will determine the top of the back support.
- Secure it with screws from the inside of the chair and secure the are to both of the supports.

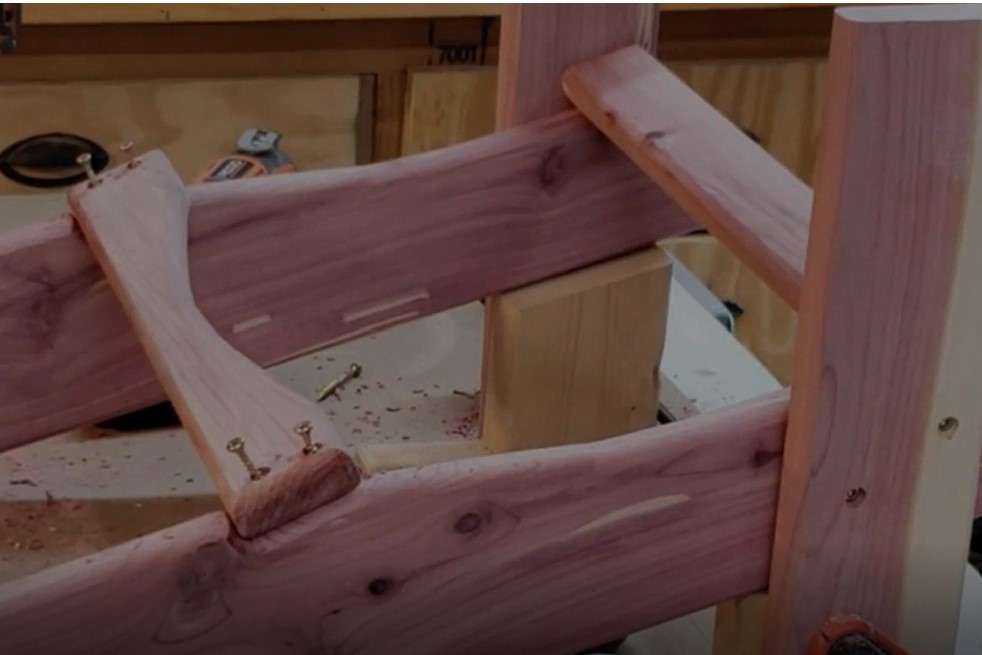
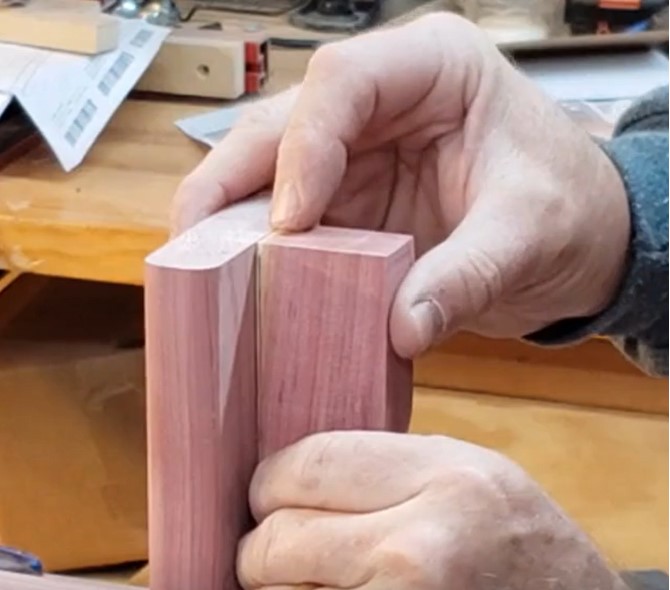
Part 7 – Support for the Middle of Back Slats
This piece attaches to the top of the back legs. Make sure your arms are secure before securing this. The round portions sit as close to the front of the high point of the back supports. This determines the support and curve of the back.
Part 8 – The Back Support
Depending on how you space them, you will need 7 or 8 of these back supports. These pieces sit vertical with the wider part at the top. Use a taper jig that can be purchased from a number of manufacturers to cut these.
The best way to keep them level at the top is to clamp a board under the bottom of Part 4 and set all of the slats onto that board and against part 7. Push the outside slats against the arms and let the bottom flow freely to determine the angle. Now set the balance of the slats between them. This is where you will determine if you want 7 or 8.
Secure the midpoint of each slat one at a time. This way you can make sure they stay even. Once they are all secure then you can secure the bottoms.

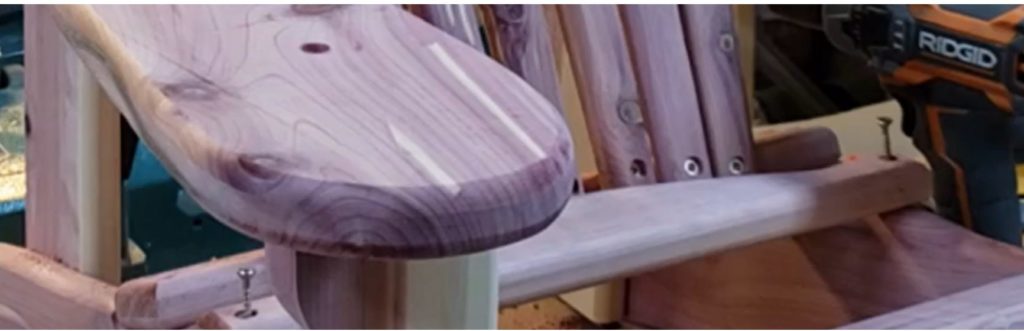
Part 9 – The Seat Part Next to the Slats
This is the last seat part that rests against the back slats. Install this piece after the back slats are installed and before the balance of the seat slats are added.
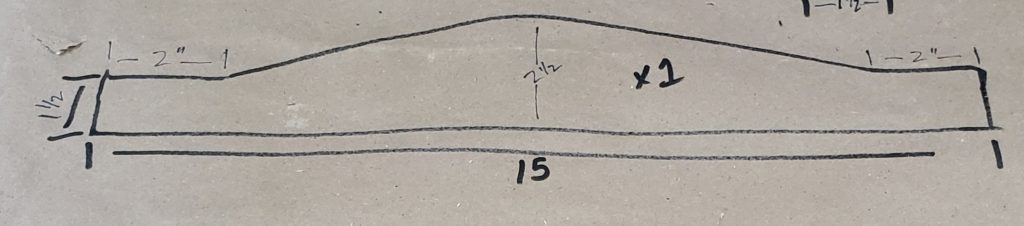
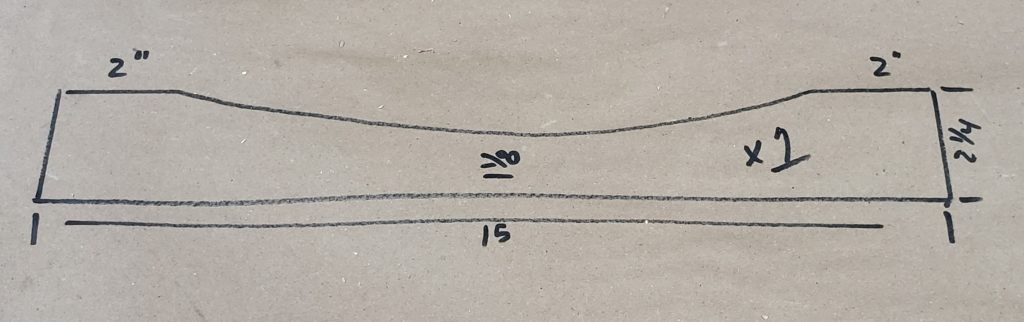
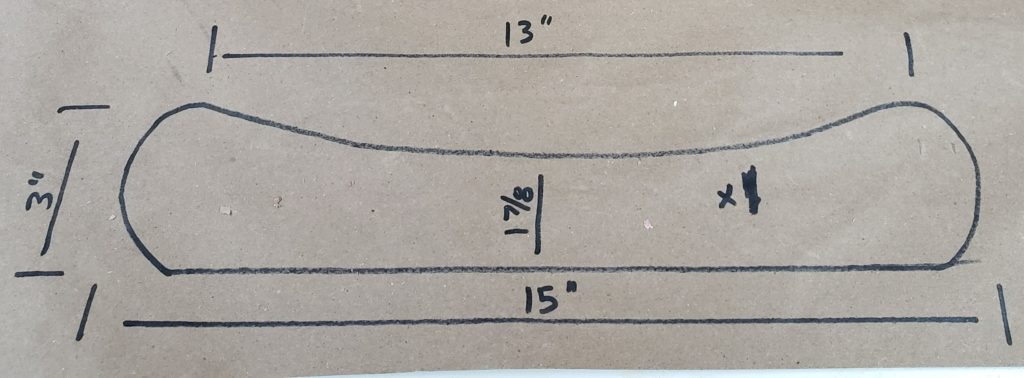
Part 10 – The Seat Slats
You will need 7 seat slats. Each one is 15″ x 1 7/8 -Attach one between the front legs during that assembly – leave it there. You will use 2 to determine the height of the back supports. Attach them to the chair frame.
Finish Child’s Chair
Sand carefully and finish with your desired exterior finish.
Now give to your favorite child and watch them enjoy it! This chair is super sturdy and will survive many years of use by kids.
Watch this video assembly of the chair.