Skip to content
Bayne Custom Woodworking
  • Services
  • AboutExpand
    • Favorite Tools
  • Gallery
  • Custom Projects and Blog Posts
  • Shop Our Products
Contact Us
Bayne Custom Woodworking

Wood Projects

Adirondack Chairs
Wood Projects

Adirondack Chairs

September 12, 2017September 3, 2024

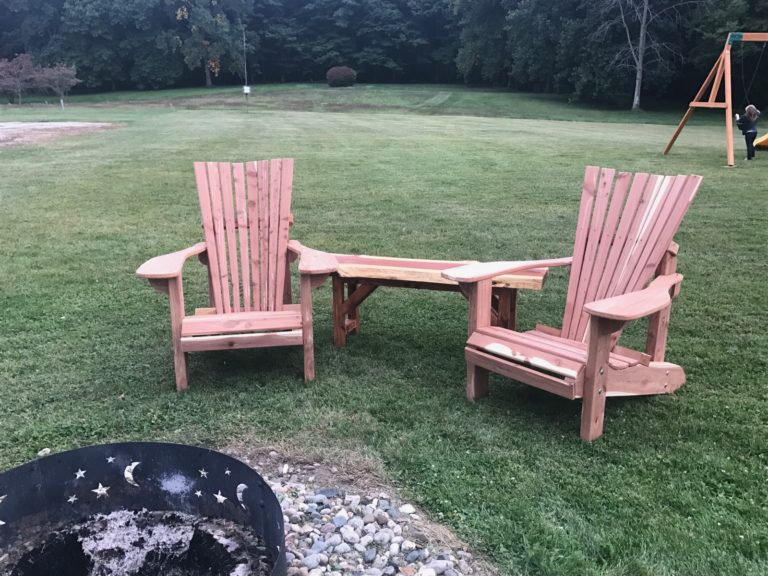
Last pieces for the Millers I had cut all the materials for 2 Adirondack chairs to take up with…

Read More Adirondack ChairsContinue

Girl's Bunk Beds
Wood Projects

Miller Family House

September 4, 2017September 3, 2024

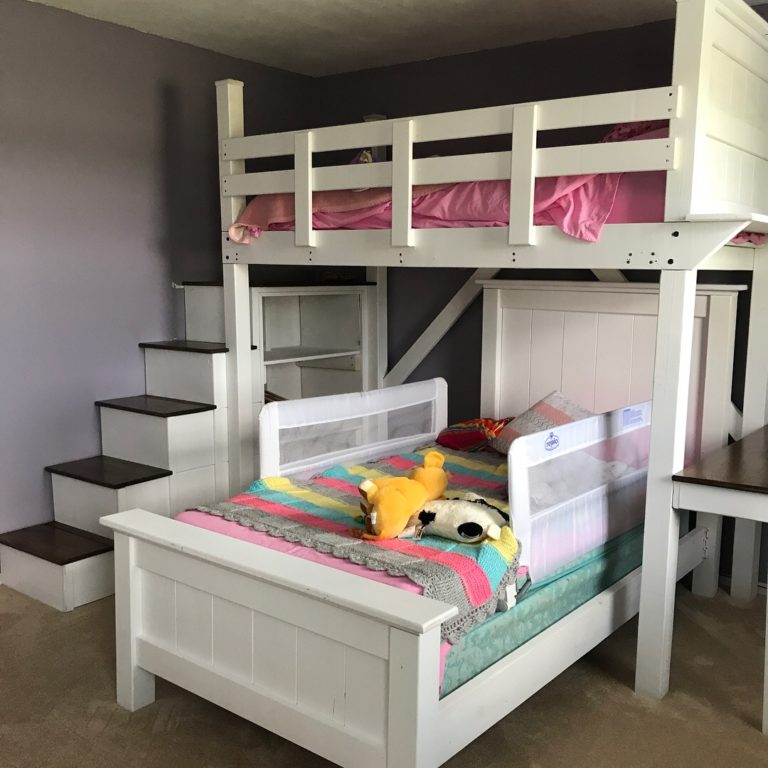
Bunk Beds, Dresser and Bathroom Vanity A few months ago my daughter asked me to build her a…

Read More Miller Family HouseContinue

Barn Door
Wood Projects

Sliding Barn Door Project

May 19, 2017September 3, 2024

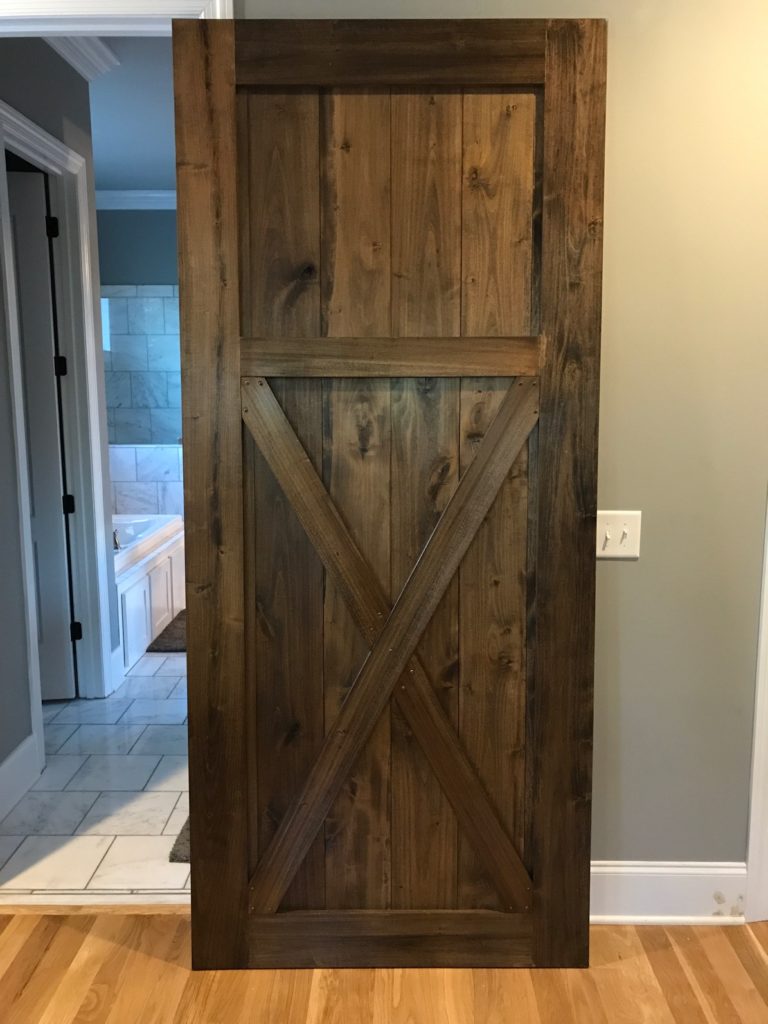
Custom Sliding Barn Door My latest project is ready to be hung and used between a master bedroom and…

Read More Sliding Barn Door ProjectContinue

Cedar Strawberry Planter
Wood Projects

Cedar Planter

February 11, 2017September 9, 2024

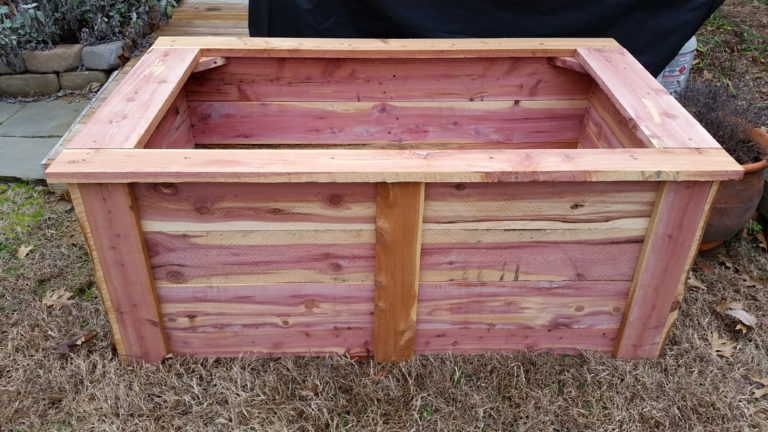
A New Home for the Strawberries The day started off with a trip to Grant Cedar mill in…

Read More Cedar PlanterContinue

Faux Fireplace
Wood Projects

Faux Fireplace

December 2, 2016September 9, 2024

Christmas Presents 2016 First of many Christmas presents finished and delivered this weekend. This faux fireplace was a…

Read More Faux FireplaceContinue

Child's Vanity
Wood Projects

Childs Vanity

June 20, 2016September 3, 2024

I was asked by a 6 year old to build a vanity. It was good practice for the…

Read More Childs VanityContinue

Jelly Cupboard
Wood Projects

Jelly Cabinet

April 17, 2016September 9, 2024

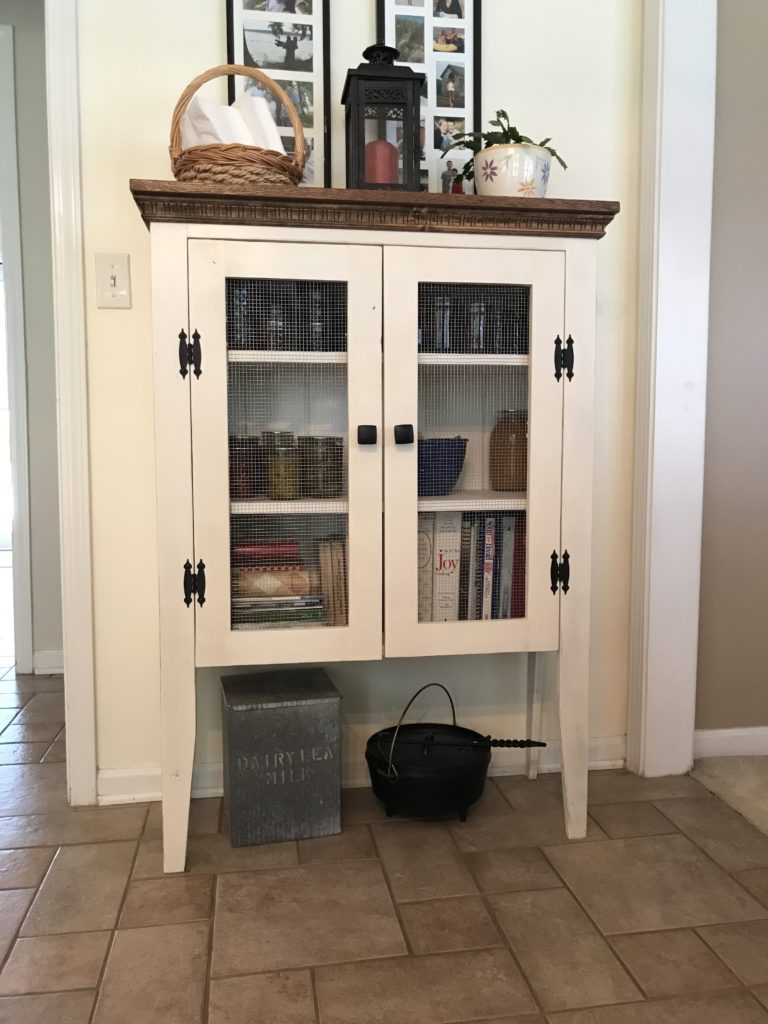
Jelly Cabinet – Another project completed for my bride to store her canned goods from the garden. Made of…

Read More Jelly CabinetContinue

A Child’s Bed
Wood Projects

A Child’s Bed

March 19, 2016September 3, 2024

A Saturday Afternoon Project – What do you do with a crib mattress, spare/scrap cedar and an hour?…

Read More A Child’s BedContinue

Story Board
Wood Projects

Story Board

January 5, 2016September 9, 2024

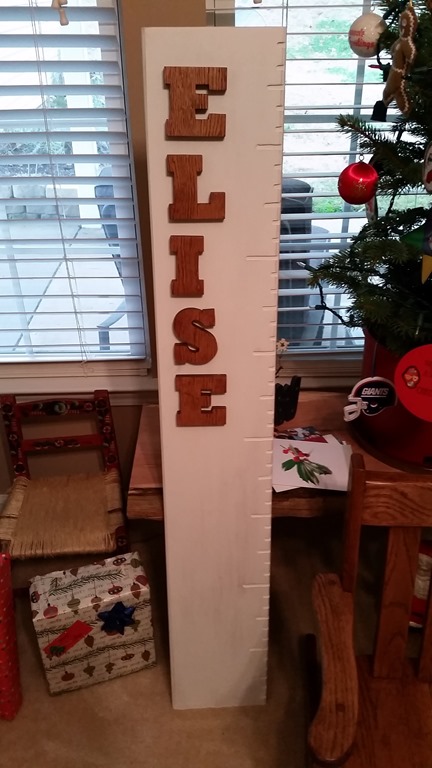
Story Board: This takes the concept of charting a child’s height to a whole  new level. I wanted…

Read More Story BoardContinue

Page navigation

Previous PagePrevious 1 … 3 4 5 6 7 Next PageNext
  • Services
  • About
  • Gallery
  • Custom Projects and Blog Posts
  • Shop Our Products

This is the continuation of my grandchildren helping me turn a childhood piano into a dining bench. Though shorter than episode one, it's fun to see and hear them break down the piano. Enjoy watching!
If you saw this video earlier, it's the same one, however I needed to upload it again because somehow the original became corrupted and stopped working.
Episode 1 - https://youtu.be/o7NNTRj9LEY

YouTube Video VVV5Zm9tc1JGenFNNXdTaUJhZGZPckx3Lm9kOHlpZ0w0WU1N

Piano Disassembly Part 2 -video fixed

Bayne Custom Woodworking March 25, 2026 6:59 am

Time to get this this custom audio stand ready for stain with my @festoolusa  sander. But do not miss the @ThorogoodWorkwear long sleeve shirt that I was able to win during their Christmas giveaway. The fit is perfect, warm and very comfortable.

Time to get this this custom audio stand ready for stain with my @festoolusa sander. But do not miss the @ThorogoodWorkwear long sleeve shirt that I was able to win during their Christmas giveaway. The fit is perfect, warm and very comfortable.

YouTube Video VVV5Zm9tc1JGenFNNXdTaUJhZGZPckx3Li00TDhERWhaeV80

Festool for finishing and Thorogood for warmth

Bayne Custom Woodworking February 25, 2026 4:12 pm

It seems everything I build is heavy and big and this project is no exception. Constructed of Red Oak, this cabinet will be for a turntable and speakers as well as other audio equipment. 
While the shelves are 1 1/2" thick x 18" deep x 60" long, the support walls are 4 1/2" thick x 16 3/4" tall by 24" long. They are the only support the shelves will have.
I used 1/2" threaded rod that runs through the shelves and then the support walls. In order to make the walls 4 1/2" thick I actually glued multiple pieces together to create the thickness. So before gluing them up I created a 1/2" groove to accommodate for the threaded rod. 
At time frame 2:22 I mention that I am routered the groove into the shelves when I am actually putting them into the supports.

It seems everything I build is heavy and big and this project is no exception. Constructed of Red Oak, this cabinet will be for a turntable and speakers as well as other audio equipment.
While the shelves are 1 1/2" thick x 18" deep x 60" long, the support walls are 4 1/2" thick x 16 3/4" tall by 24" long. They are the only support the shelves will have.
I used 1/2" threaded rod that runs through the shelves and then the support walls. In order to make the walls 4 1/2" thick I actually glued multiple pieces together to create the thickness. So before gluing them up I created a 1/2" groove to accommodate for the threaded rod.
At time frame 2:22 I mention that I am routered the groove into the shelves when I am actually putting them into the supports.

YouTube Video VVV5Zm9tc1JGenFNNXdTaUJhZGZPckx3LjRpZEs0TThTcWt3

Audio System Stand

Bayne Custom Woodworking February 23, 2026 5:43 pm

Time to get creative in order to assemble this Custom Stereo Console. It's 38" tall with 3, 1 1/2" thick red oak shelves and supports 16 3/4" tall, so I needed to come up with a way to hold it all together. I decided to run threaded rod through all 38". After routering grooves in the supports and drilling holes in the shelves I needed to get creative to insert the rod through it all. I pulled out my @ridgid drill driver and let it do the hard work. 
@RIDGID_Tools

Time to get creative in order to assemble this Custom Stereo Console. It's 38" tall with 3, 1 1/2" thick red oak shelves and supports 16 3/4" tall, so I needed to come up with a way to hold it all together. I decided to run threaded rod through all 38". After routering grooves in the supports and drilling holes in the shelves I needed to get creative to insert the rod through it all. I pulled out my @ridgid drill driver and let it do the hard work.
@RIDGID_Tools

YouTube Video VVV5Zm9tc1JGenFNNXdTaUJhZGZPckx3LmtNUUZMQllkUGtn

Creative way to insert threaded rod

Bayne Custom Woodworking February 19, 2026 8:44 pm

Load More... Subscribe

© 2026 Bayne Custom Woodworking | Nashville Woodworker | Custom Furniture

Facebook Instagram YouTube
Scroll to top
  • Services
  • About
    • Favorite Tools
  • Gallery
  • Custom Projects and Blog Posts
  • Shop Our Products
Contact