We Love Turning Live Edge Slabs into Furniture.
Especially with modern hairpin legs. Each slab is unique and we love imagining what we could make out of each piece!
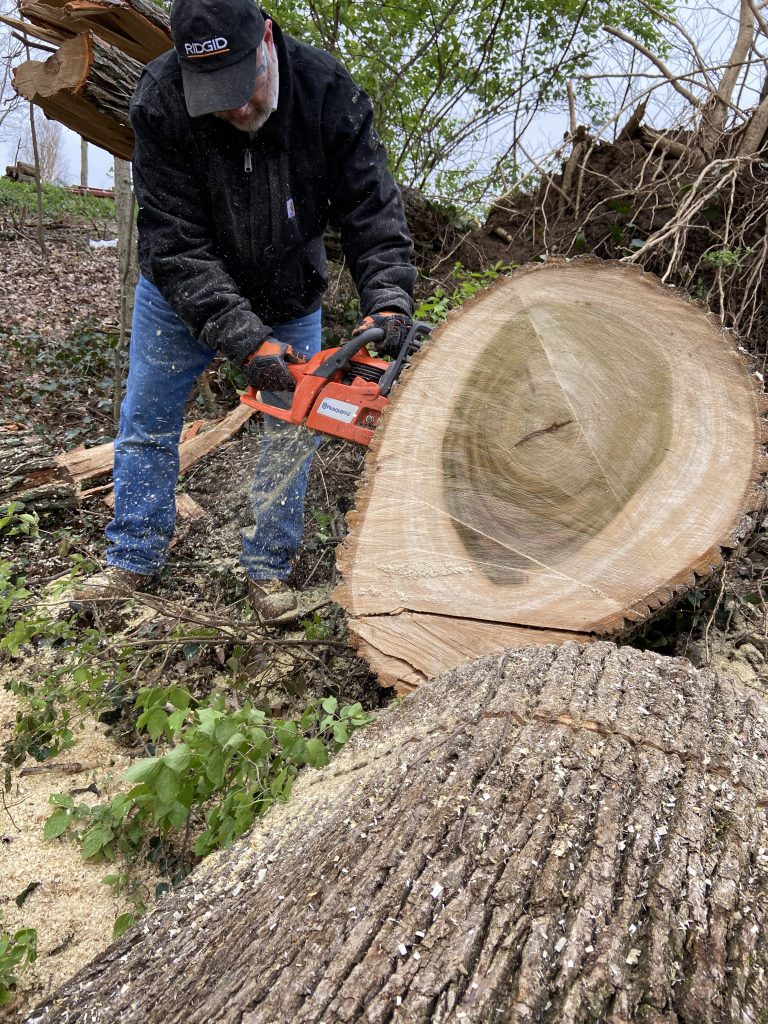
Harvesting Wood From A Tornado
Ever since we began this business we look at wood in a different way. Early March of this year we had a large tornado touch down in our area. We were saddened to see so many beautiful trees destroyed, many turned to splinters. Fortunately we harvested some trunks which will make beautiful tables, grateful to make lemonade out of lemons.

Raw Wood Takes Time to Dry
Harvesting these slabs encouraged us to check out the slabs we’ve had around the workshop for awhile. Raw wood takes time to dry – it’ll be a few months before the rounds are ready for furniture making.
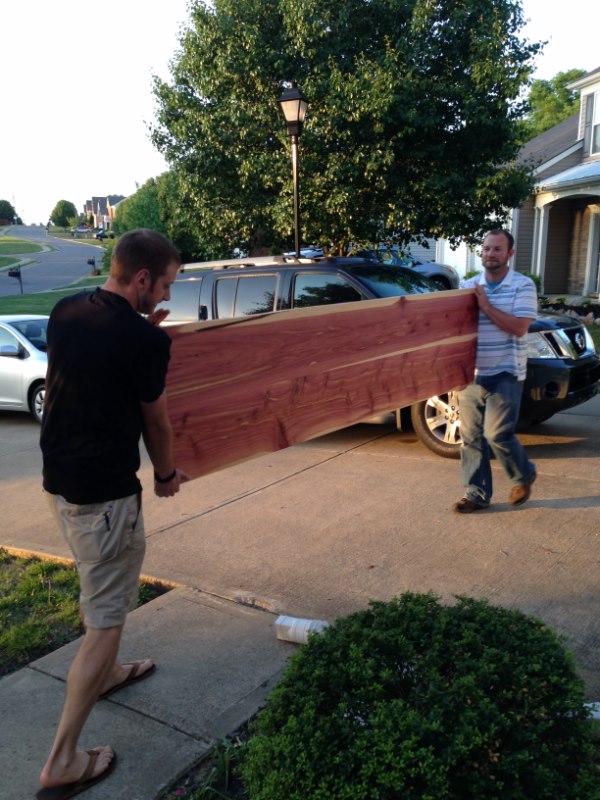
Preparing Slabs for Furniture
As this quarantine has us all home we decided we’d work with the materials we had on hand. It was a perfect time to make some live edge desks. So we pulled out a couple of black walnut slabs and a cedar slab from the pile.

Using a Sled to Even Surfaces
The first step to preparing the slabs is removing the bark. This step reveals the real beauty of each piece and it’s a fascinating process. Roger works carefully making sure he takes off just enough.

Then the slab needs to be surfaced to even it out, using a sled and router. It’s a messy process – but you can see a difference immediately.

Sanding the Live Edge Slabs
The next step requires the drum sander and multiple passes to smooth both sides. Then palm sanding with 320 grit sand paper brings them to the perfect smooth finish they need.

Finishing the Live Edge Slabs
Roger demonstrates the finishing method on these tables in his latest video. You’ll see all three tables finished with their hair pin legs at the end.
If you’d like the instructions for the mix you’re welcome to sign up for our newsletter and receive it or download it here.
Adding Hairpin Legs
If you watched the video you’ll see all three tables ended up exactly the same height. We choose to make the height 28 inches, but that meant buying the hairpin legs at different heights because of the different thicknesses of each slab.
We purchase the desk legs from DIY Hairpin Legs We chose the thicker metal and three rod hairpin legs for the Black Walnut table because it is a heavy slab. The other two we used the two rod hairpin legs and less thick metal which accented the tables extremely well.
This company was awesome to work with, especially during these challenging times!

Prepping the Next Round of Slabs
We have already sold two of these tables and we gave one to a friend who lost everything in the tornado. We can’t wait to start working on the next set of slabs we have and when they’re finished we can begin working on the rounds.
If you’d like to claim one for yourself please contact us here.
Follow Bayne Custom Woodworking
If you’d like to keep track of the process – follow Bayne Custom Woodworking on Facebook and Instagram and subscribe to our channel on YouTube. We love sharing the stories of our projects.
Until next time! Roger and Becky Bayne, Bayne Custom Woodworking, LLC