Wooden Toys for Kids
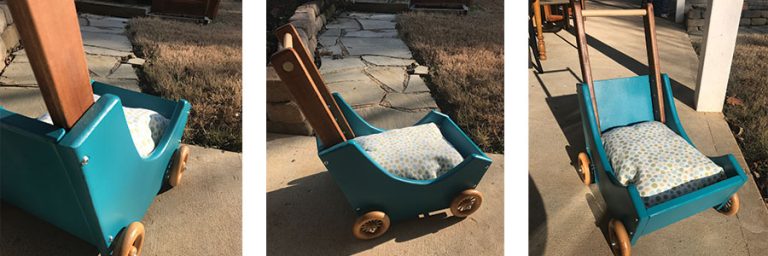
This year our eldest granddaughter showed me a photo of a child’s wooden shopping cart and asked if I could build it. “Of course” I said, and then went searching for plans! I was able to find a nice set of plans to use here. These plans for the shopping cart were done well and I was willing to support this small business by purchasing the set. I found them to be direct, well thought out and complete.
There is nothing more I enjoy building in the shop than toys. Having 4 grandchildren allows me to build for birthdays, random visits and especially for Christmas. I remember the first Christmas gift, for our first granddaughter, was a set of cedar building blocks. At the time she was 6 weeks old and spending her first Christmas with us here in Tennessee.
Since then there have been many sets of blocks and other toys built. It’s been fun to build for our grandchildren, and for other children as well.
Choosing the Project
The process starts with asking the kids what they want, usually happens during our annual family vacation in September. I really need to get these answers sooner as they get older and the gifts become more elaborate and time consuming.
Now that there are four grandkids, I have to save up vacation days so I can get Fridays in the shop too. That really helps me complete the Christmas gifts and customer projects.
Choosing Materials
The child’s wooden shopping cart plans called for plywood. But I purchase my wood from a local lumber mill. I had plenty of rough poplar on hand so I used that for the sides. Because the poplar is just under 8” wide rough and the sides are 15 ¾” I needed to glue 2 pieces together. I used pocket holes to join them and adjusted the size just a bit so I only needed 2 pieces. The sides ended up being a finished size of 15 ¼”.
I found wooden spoke wheels at Woodworks LTD. They worked perfectly for this application. I used 3/8” aluminum rods with hub caps purchased at Home Depot to hold the wheels to the cart. A hammer secured the first hub cap. Placing a wheel next to the hub cap and then a washer between the wheel and the cart, I slid the axle through the cart and added the washer. Added the wheel and placed a mark for where I needed to cut the length. I then used my jig saw with a metal cutting blade to cut the axle to length. I used my hammer to tap the second axle cap on the axle. Then just repeated the process for the second axle and finished the shopping cart.
I knew going into the project I was going to paint the child’s wooden shopping cart. Using pocket holes would not cause an issue because the paint would cover them. However I still needed to fill the holes. In the past, I have used wood putty. I decided to step up the game this time and use dowels to fill the pocket holes. I used my band saw and I cut 3/8” dowels into 2” lengths. Adding a little glue, I used my rubber mallet to tap the dowels into each hole. I then used my double edge bear saw from Vaughan & Bushnell to flush cut the dowels prior to sanding.
Using the plans provided I created all the straight lines for the shopping cart. Then used an old plastic container to draw the circle for the bottoms and the very top. I used my Grizzly band saw to cut the sides. I left the lines in order to clean them up with my @ridgidpowertools oscillating sander.
Challenges
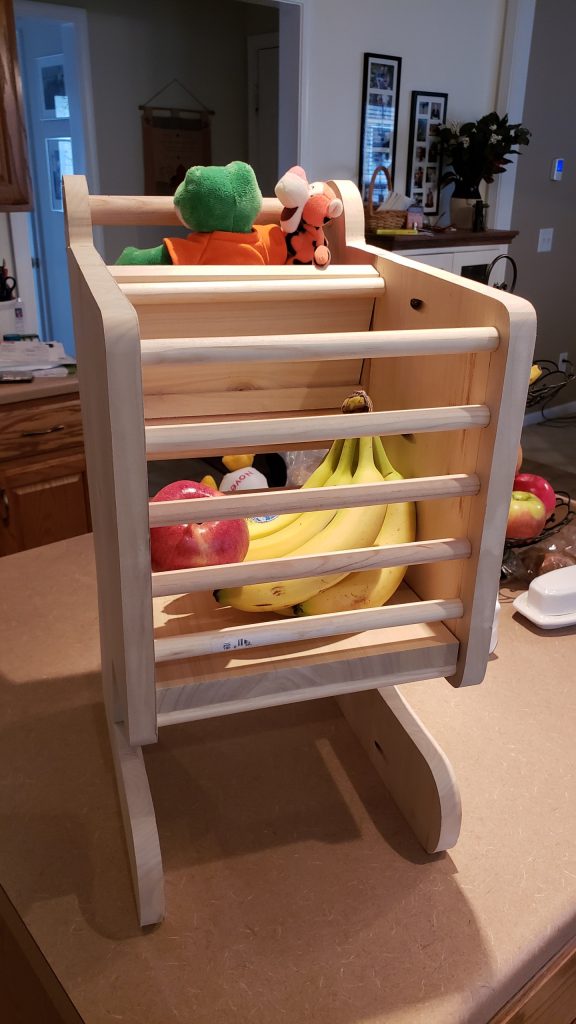
The dowels for the shopping cart were a challenge to mark and assemble. First I needed to drill them out. I was using ½ dowels so I used a ½” forstner bit to drill 3/8” deep holes to accept the dowels during assembly. I used my drill press for this operation. This kept the holes straight and in line.
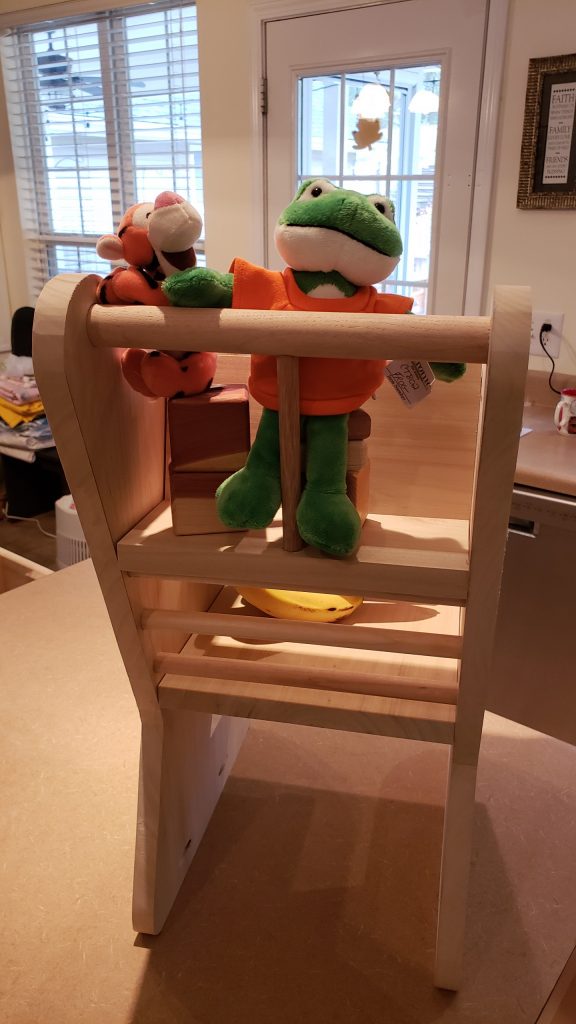
The next challenge was to get the dowel used as the bar in the doll seat to fit into the dowel being used for the handle. The shopping cart handle was a 1½” dowel while the center dowel was 3/8”. Using my drill press I mounted the handle in clamps and drilled using the same forstner bit as above and drill approximately 3/8”.
Now let’s get a round dowel into another round dowel and into a flat seat with another hole drilled and get that mounted into the cart without taking the entire cart apart. I slid the handle into the holes I drilled earlier in the sides to hold the handle. Inserted the center dowel into the handle and pulled the seat board towards me and out of the cart. I started to rotate the handle towards the cart until it met the hole in the seat, then I proceeded to rotate the handle and push the seat forward allowing the center dowel to slowly slide into the seat as the seat moved forward into place. Like magic the center dowel found home and the seat dropped into place.
Sanding and Assembly
When all the pieces for the wooden shopping cart were cut and sanded I used my router table with a round over bit to round over all the edges. I then hand sanded all of the edges as well. I want all edges to be as smooth as possible.
After assembly I dry fitted all of the dowels, the seat and the cart tray for proper fit.
We decided to paint the body of the cart. We chose to stain the seat and cart base and polyurethane the dowels. It gave the cart a nice contrast of wood and bright colors.
After applying Kilz primer to the sides I used Behr acrylic satin paint, which gives it a beautiful bright finish. Then I stained the seat and base with Minwax English Chestnut and applied polyurethane after it dried.
Finishing the Child’s Wooden Shopping Cart
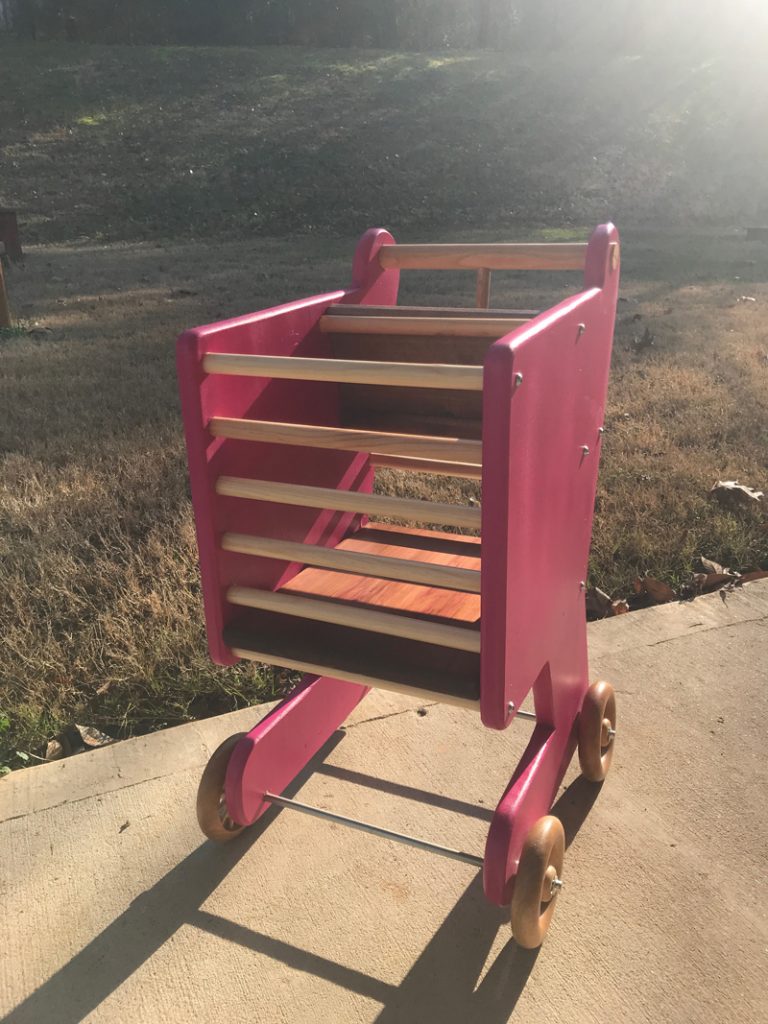
I found wooden spoke wheels at Woodworks LTD. They worked perfectly for this application. I used 3/8” aluminum rods with hub caps purchased at Home Depot to hold the wheels to the cart. A hammer secured the first hub cap. Placing a wheel next to the hub cap and then a washer between the wheel and the cart, I slid the axle through the cart and added the washer. Added the wheel and placed a mark for where I needed to cut the length. I then used my jig saw with a metal cutting blade to cut the axle to length. I used my hammer to tap the second axle cap on the axle. Then just repeated the process for the second axle and finished the shopping cart.
I always use a clear spray acrylic on any toy I build to give the paint more durability. To coat the wheels, I used the same polyurethane using my sprayer and spray tent. Check out my video on Youtube to see how I managed to keep them all evenly covered!
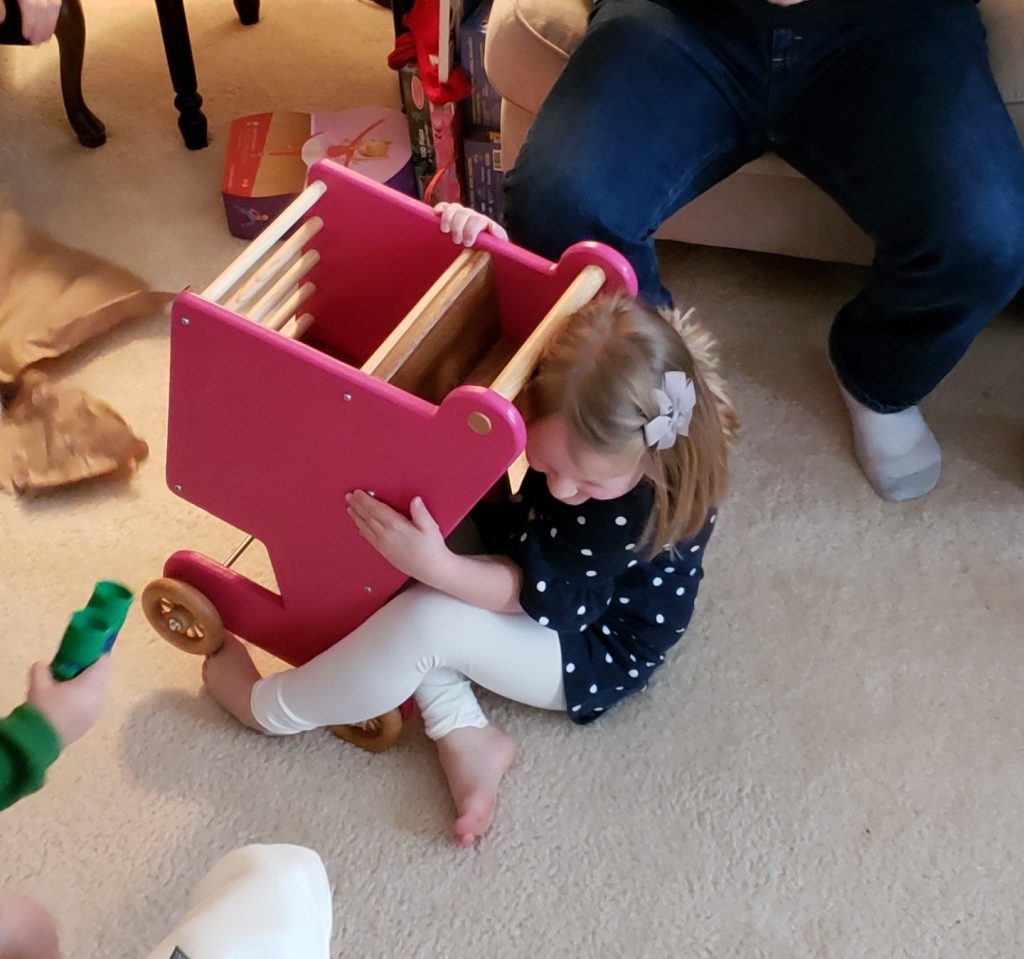
Her reaction on Christmas morning was worth all the hard work!
